LEARNING MODULE:
Who Am I
“Deal with yourself as an individual worthy of respect,
and make everyone else deal with you the same way. ”
–Nikki Giovanni
Who Am I is a process to reflect on oneself while learning about each other — as a staff and with students. This is very important for all students including early childhood through drawings, elementary and secondary where they can be reflective about their journey in words, phrases and drawings. The process follows the Pedagogy of Confidence structure of the Pedagogical Flow Map (PFM) with Priming, Processing and Retaining for Understanding. The key model used is Thinking Maps® to explore 1. one’s self, 2. their community and 3. their ancestors through the use of the cognitive language of the visual language/tools Thinking Maps®.
• PowerPoint (Pre-K — 8)
• PDF file of the PowerPoint (Pre-K — 8)
• PowerPoint (MS and HS)
• PDF file of the PowerPoint (MS and HS)
• Who Am I Print Version of the Guide (students can do the maps within the guide) PDF
PowerPoint (Pre-K — 8)
PowerPoint (Secondary – HS and MS)
The PowerPoint Presentations to the left can also be downloaded to your hard drive with the links above or here:
• PDF file of the PowerPoint (Pre-K — 8)
• PDF file of the PowerPoint (MS and HS)
The Pedagogical Flow Map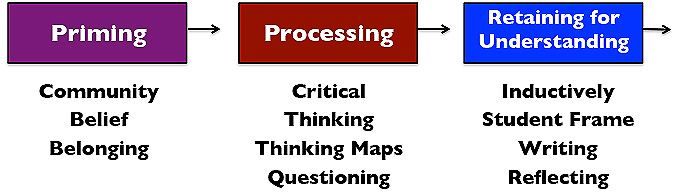
The Pedagogical Flow Map (PFM) is the structure that creates a framework for translating the Pedagogy of Confidence into lesson or unit designs.
• Priming
• Processing
• Retaining for Understanding
The PFM addresses the:
• what — the standards of the disciplines and content acquisition
• how — the standards of the disciplines and content acquisition
The PFM ensures alignment with the High Operational Practices (HOPs) of the Pedagogy of Confidence. This means that instruction will be designed around the development of cognition that leads to high operational performance.
More on The Pedagogical Flow Map
“The two most important days in life are the day you born
and the day you discover the reason why.”
– Mark Twain
Stefanie Rome, Executive Director of NUA interactively models the Pedagogical Flow Map with students in a classroom setting.
•> Priming
•> Processing
•> Retaining for Understanding
Thinking Maps®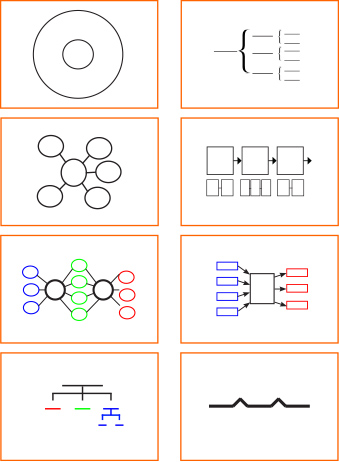 Thinking Maps®, created by David Hyerle, are consistent visual patterns linked directly to eight specific thought processes. By visualizing our thinking, we create concrete images of abstract thoughts to reach higher levels of critical and creative thinking individually and collaboratively. Thinking Maps® establish a consistent language for thinking and problem solving. The goal is to have the students work independently choosing the cognitive process of a Thinking Maps® that best supports their thinking.
The language of Thinking Maps® is a language of eight fundamental cognitive skills. The eight cognitive skills are defining in context, describing attributes, comparing and contrasting, classification, part-whole spatial reasoning, sequencing, cause and effect reasoning, and reasoning by analogy. Each of the eight processes additionally can have a Frame of Reference (the rectangle around each map) to further expand information, schema and thinking. To further thinking with the Frame of Reference, go to the Depth and Complexity page.
More on Thinking Maps®
“Indians think it is important to remember,
while Americans believe it is important to forget.”
―
 |  |  | ||
| Day 1: Brainstorming | Day 2: Qualities | Day 3: Sequencing | Day 4: Cause / Effect | Day 5: Categorization |
The Lessons: Who Am I
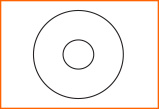
Day 1 • First Map: Circle Map (Thinking Maps®) for Brainstorming
“You can’t use up creativity.
The more you use, the more you have.”
–Maya Angelou
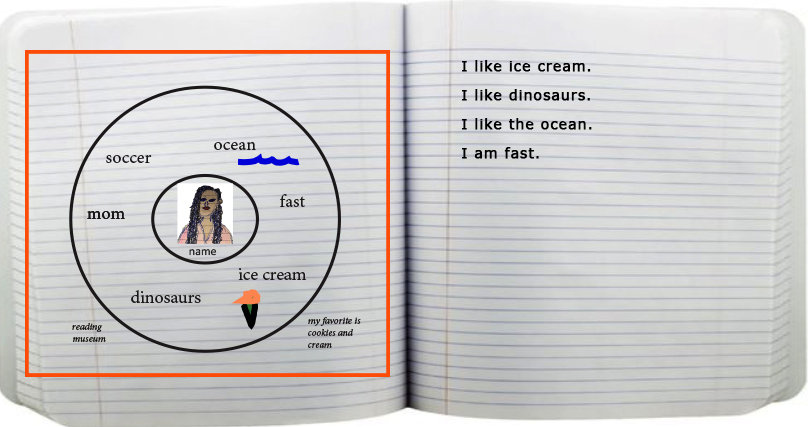
OverviewThe Circle Map is for defining in context about something. For Who Am I the students will use the Circle Map to define things about themselves. This can include things they like, habits they have, places they have been, and anything about themselves. When doing the Circle Map, and any map, it is important the teacher models doing the map for themselves first as a model of thinking and doing.
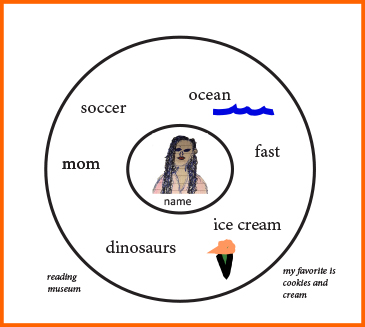
 On the initial use of the Circle Map, it can be with just the information above. This will be expanded when doing Community to use the Frame of Reference as well. The Frame can be used to expand with details for the information about themselves. An example is if they write they have been to a specific place, then can add in the frame what they did there, how they got there or similar expansion of information or evidences. Like above, when doing the Circle Map with the Frame, and all maps and the frame, it is important the teacher models doing the map for themselves first as a model of thinking and doing.
A three minute video overview of
Who Am I, Day 1.
1. Community Building with Commonalities Participants face the inside of the circle on their individual spots. One person (start with the lead facilitator modeling several times, then each person will do it once) will state something true about themselves. An example might be “I have taken guitar lessons.” Then everyone who has this “In Common” with the person who stated “I have…” will leave their spots and trade with someone else. This is followed by another person sharing something true about themselves. Then everyone who has this “In Common” with the person who stated “I have…” will leave their spots and trade with someone else.
More on Building Community Together
 2. Who Am I Drawing and Name
To develop the whole community, while practicing drawing a drawing of oneself (and writing their name below the drawing), the following can be done in several ways including:
• in pairs on a paper
• in small groups on larger paper
• as a whole class on a large sheet of butcher paper spread out
• and/or in steps of the above
The teacher can model drawing their own face along with one or two students to model. Model thinking aloud as you do key features, and support the students and welcome them supporting you. With younger children, the use of a mirror can also be an excellent support tool.
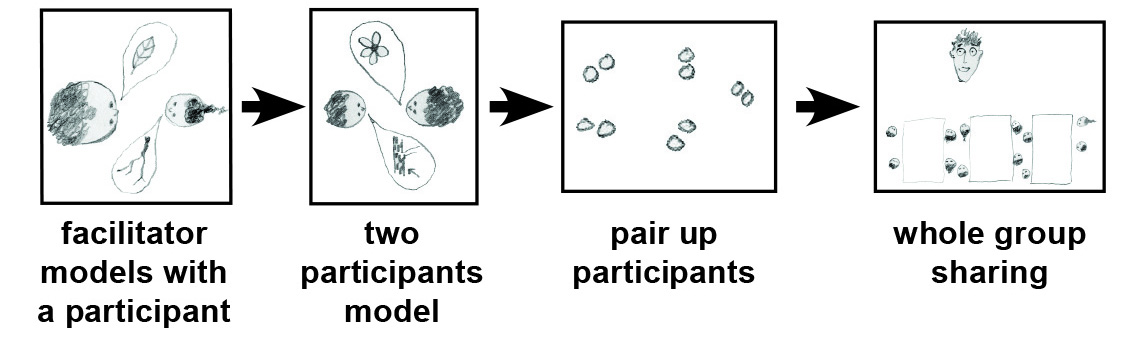
Preceding the above, you can have the students do a Think-Pair-Share sharing three positive key features they observe of one another that can be incorporated into the drawings. When doing Think-Pair-Share it is always recommended that the order of modeling is first the teacher with a student; second student-student (peer to peer modeling for the whole class); third all students paired up; followed by a whole group sharing).
3. Collaboratively Learning About One Another
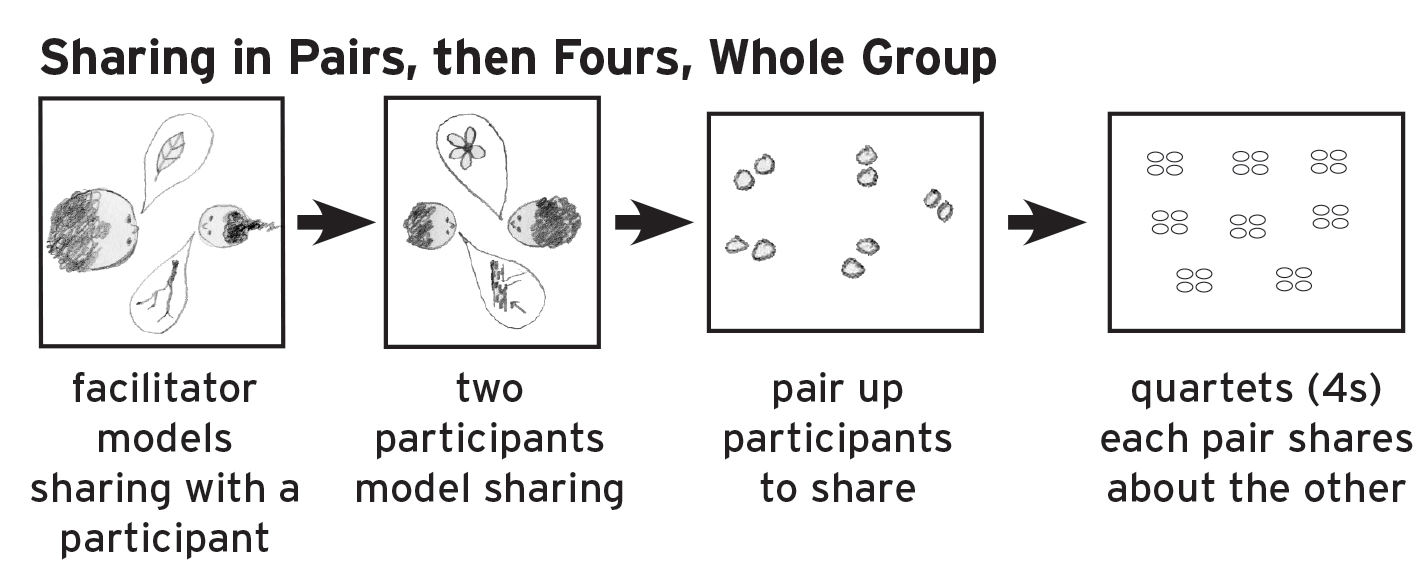
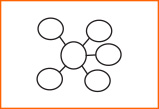
Have the students Think-Pair-Share things about themselves. This can be things they do, places they have been, interests they have, people in their family and so forth. What the teacher models with the student initially will be a powerful modeling of what the possibilities are. Follow the same Think-Pair-Share format as the above priming with three positive features. This is building a collaborative community, developing background knowledge and having all students involved in a student centered atmosphere. When the students are ready to ‘change up the process‘, you could have the Think-Pair-Share go from pairs to fours (see visual).

Circle Map (Thinking Maps®) for Brainstorming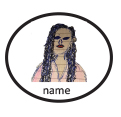 Draw picture of self with name under the picture. After drawing the picture and adding the name, then draw a circle around your drawing and name. It is important to do the drawing and name first, then the circle so that the drawing and name fit. Model with yours first (the educator), and then have a student(s) model to the whole class. It is recommended for both success and community to have the students do these in small groups so they can observe and communicate the ‘how-to’ together supporting one another.
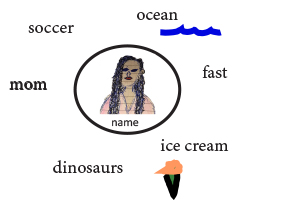 Next model to the students, with another student(s) like the Think-Pair-Share model in the Priming stage, adding to the Circle Map about oneself. Do not have them draw an outer circle until they have added details about themselves. While the illustration of the map here is in words and drawings, drawings are equally good to use for emergent readers. This is important so that there is always room to add information initially. As they become more proficient with the maps, the students will proceed with estimation skills and depth of understanding with doing the maps. This includes later when the maps can also be done inductively and the frame of reference first. But that is for later — now simply proceed with information about oneself with the teacher initially modeling. Things about themselves include:
• physical characteristics;
• your gifts (things you are good at);
• experiences;
• interests;
• family members
• events
• places you have gone
• and anything about you that you would like to share about you.
It is helpful to have students contribute ideas which could be put on a whole class Circle Map of ideas to consider when brainstorming ‘Who Am I’ ideas of information about ourselves.
Extension
An extension that will be used later in lessons that could be incorporated now as well is adding the frame to the Circle Map. This is something that can be used on all maps. The example to the right shares how students can expand their things about themselves with details, who, how, why and where. Further information about the frame and how to use it may be found on the cultural frame of reference page, the Thinking Maps® page, the schema page and the depth and complexity page.
To support the Retaining for Understanding several pathways are suggested:
• individual oral presentations reading from the maps;
• free write
• writing from a sentence pattern and/or free write extension expanding from the sentence frame (differentiation)
Presentations: For beginning readers/writers especially with pre-k and K, the students can read their maps following their images in reading. An example is they share ‘I like ice cream’; ‘I like to go fast’; and so forth. When presenting each student stands, says “Hello my name is ________” or similar, then shares two things on their Thinking Map, followed by showing the map to the whole class.
Free Write: The students write about themselves from the information on the Circle Map. It is important the teacher model strategies of writing from their personal Circle Map with the students observing. I would then have a student do the same with the class observing (either via a projection with the student’s actual writing and/or in a fishbowl setting). Then all students write. After writing I would have students read one sentence (a ‘favorite’) from their writing to the whole class. This provides affirmations and models of success.
 Sentence Frame (Patterns): Students are provides a sentence frame to write from. Writing patterns build an understanding of sentence structure in a non-threatening manner. It is important to develop ideas through patterns, visual mapping, collaborative recitation, vocabulary building, working language with a pocket chart, and writing. It will benefit the students to use words for patterns that reflect common usage (see the list of 100 and 1000 most used words in the English language). Patterns provide models of excellence while building on the brain seeking patterns. The goal is to set the stage for successful original writing.
Some simple examples include:
I like ________.
I like ________.
…
I like playing ________.
I like playing ________.
…
To facilitate success initially model and have students ‘read’ their maps following the flow with their fingers reading their maps orally. This is similar to the reading above with presentations with the examples: they share ‘I like ice cream’; ‘I like to go fast’; and so forth.
Class Reflection
Share the ‘tools’ we used to develop our ideas and help our presentations and writing. Some examples they will share are the Circle Map for brainstorming; Think-Pair-Share; the collaborative methods; and so forth.
| | | ||
| Day 1: Brainstorming | Day 2: Qualities | Day 3: Sequencing | Day 4: Cause / Effect | Day 5: Categorization |
Day 2 – Second Map: Bubble Map (Thinking Maps®) for Describing
“I want my work to reflect my level of gifts and talents.”
—Viola Davis
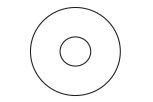
OverviewThe Bubble Map which is specifically for qualities of the person. This includes descriptive words and adjectives that describe themselves. Unlike the Circle Map that is used for brainstorming, the Bubble Map is a tool for specifically identifying qualities and characteristics and for refining the use of descriptive words. In the center circle, write the word or thing being “described.” In the outside bubbles,” write in adjectives and/or adjective phrases to describe something.
 On the initial use of the Bubble Map, it can be with just the information above. This will be expanded when doing Community to use the Frame of Reference as well. The Frame can be used to expand with details for the qualities about themselves. An example is if they write they are curious, then can add in the frame an example of how they are curious and/or an expansion of information on or evidences. Like above, when doing the Bubble Map with the Frame, and all maps and the frame, it is important the teacher models doing the map for themselves first as a model of thinking and doing.
A five minute overview video on using the visual tool for qualities (Bubble Map – Thinking Maps® language) including Priming -> Processing -> Retaining for Understanding, and a brief at the end overview of Thinking Maps compared with construction tools.
1. Community Building with Commonalities (Changing It Up with Qualities/Gifts)Participants face the inside of the circle on their individual spots. One person (start with the lead facilitator modeling several times, then each person will do it once) will state a quality / gift of themselves (descriptive words / adjectives). An example might be “kind”. Then everyone who has this “In Common” with the person who stated “I am…” will leave their spots and trade with someone else. This is followed by another person sharing something true about themselves. Then everyone who has this “In Common” with the person who stated “I have…” will leave their spots and trade with someone else. Debrief the students on the purpose of this community building exercises.
More on Building Community Together
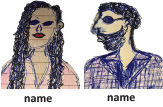 2. Who Am I Drawing and Name – Drawing Each Other Together
The teacher pairs up with a student and models drawing one another. Then have two students draw one another with the whole class observing (on a projection device or in a fishbowl setting). They can be drawn on the same paper concurrently.
3. Collaboratively Learning About One Another’s Qualities / Gifts
Have the students Think-Pair-Share qualities / gifts about themselves. This can be things that describe them: kind, fast, curious, helper, athletic, and so forth. What the teacher models with the student initially will be a powerful modeling of what the possibilities are. This is building a collaborative community, developing background knowledge and having all students involved in a student centered atmosphere. When the students are ready to ‘change up the process‘, you could have the Think-Pair-Share go from pairs to fours (see visual).
Bubble Map (Thinking Maps®) for Describing Qualities The teacher models drawing a picture of themself with name under the picture. They then have two students model to the whole class. After drawing the picture and adding the name, then draw a circle around your drawing and name. It is important to do the drawing and name first, then the circle so that the drawing and name fit. Model with yours first (the educator), and then have a student(s) model to the whole class. It is recommended for both success and community to have the students do these in small groups so they can observe and communicate the ‘how-to’ together supporting one another.
Bubble Map (Thinking Maps®) for Describing Qualities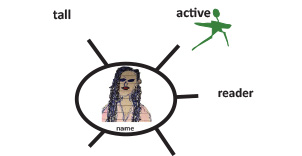 Teacher models with a student(s) doing a Bubble Map on qualities / gifts, each doing a Bubble Map of themselves. The teacher models eliciting ideas together, affirming the student with their ideas, acknowledging how they learn from the student. The map can be done in words and/or drawings. It is important to model writing the word or drawing the picture prior to putting a circle around it. This makes sure there is sufficient space to fit the whole word and/or drawing.
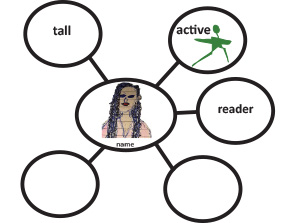 After each new quality / gift, then put a circle / oval around the writing and/or drawing. This differentiates the Bubble Map for qualities only from the Circle Map which is for brainstorming. Also draw a line from the center to each quality / gift. This could also be done with clip art or clippings (collage style) from magazines. It could also be a combination of all of the above. I would go around the classroom as students are creating their Bubble Maps and have them read their maps in complete sentences. An example would be: ‘name’ is a reader; ‘name’ is very tall.
Extension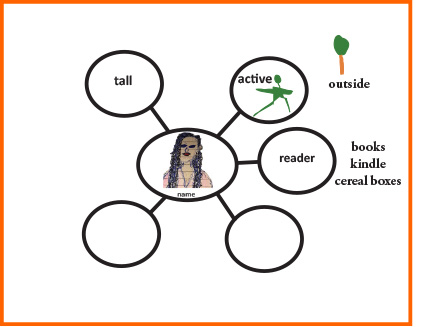 An extension that will be used later in lessons that could be incorporated now as well is adding the frame to the Circle Map. This is something that can be used on all maps. The example to the right shares how students can expand their things about themselves with details, who, how, why and where. Further information about the frame and how to use it may be found on the cultural frame of reference page, Thinking Maps® page, the schema page and the depth and understanding page.
To support the Retaining for Understanding several pathways are suggested:
• individual oral presentations reading from the maps;
• free write
• writing from a sentence pattern and/or free write extension expanding from the sentence frame (differentiation)
Presentations: For beginning readers/writers especially with pre-k and K, the students can read their maps following their images in reading. An example is they share ‘I like ice cream’; ‘I like to go fast’; and so forth. When presenting each student stands, says “Hello my name is ________” or similar, then shares two things on their Thinking Map, followed by showing the map to the whole class.
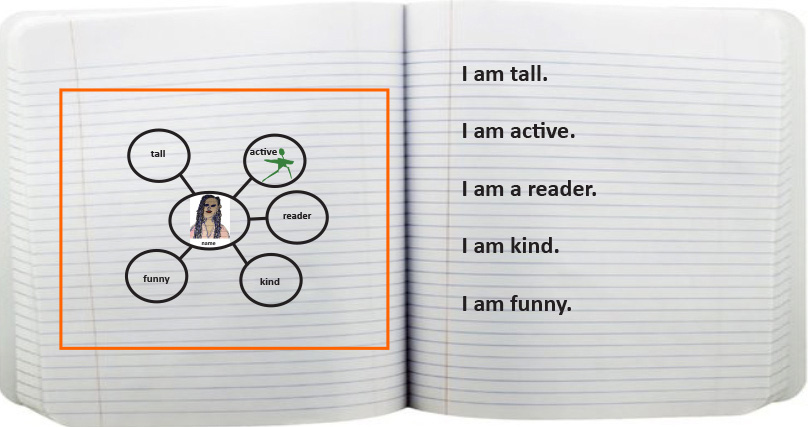
Free Write: The students write about themselves from the information on the Bubble Map for qualities. It is important the teacher model strategies of writing from their personal Bubble Map for qualities with the students observing. I would then have a student do the same with the class observing (either via a projection with the student’s actual writing and/or in a fishbowl setting). Then all students write. After writing I would have students read one sentence (a ‘favorite’) from their writing to the whole class. This provides affirmations and models of success.
 Sentence Frame (Patterns): Students are provides a sentence frame to write from. Writing patterns build an understanding of sentence structure in a non-threatening manner. It is important to develop ideas through patterns, visual mapping, collaborative recitation, vocabulary building, working language with a pocket chart, and writing. It will benefit the students to use words for patterns that reflect common usage (see the list of 100 and 1000 most used words in the English language). Patterns provide models of excellence while building on the brain seeking patterns. The goal is to set the stage for successful original writing.
Some simple examples include:
I am ________.
I am ________.
…
I am ________ like a ________.
I am ________ like a ________.
…
To facilitate success initially model and have students ‘read’ their maps following the flow with their fingers reading their maps orally. This is similar to the reading above with presentations with the examples: they share ‘I like ice cream’; ‘I like to go fast’; and so forth.
Class Reflection
Share the ‘tools’ we used to develop our ideas and help our presentations and writing. Some examples they will share are the Bubble Map for qualities; Think-Pair-Share; the collaborative methods; and so forth.
| | | ||
| Day 1: Brainstorming | Day 2: Qualities | Day 3: Sequencing | Day 4: Cause / Effect | Day 5: Categorization |
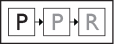
Day 3 – Third Map: Flow Map (Thinking Maps®) for Sequencing
“Usually I can hear the sequence of an album as I’m going.”
—Dr. Dre
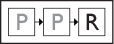
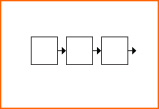
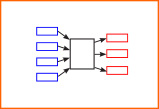
Overview![]() The Flow Map is used for sequencing and ordering information. Sequencing is the process of identifying the relationships between stages and substages of an event (or order of numbers, operations, steps, etc.). In the outside rectangle write the name for the event, or sequence. In the larger rectangles-flowing from left to right-write in the major stages of the event. In the smaller rectangles below, write in the substages of each major stage.
The Flow Map is used for sequencing and ordering information. Sequencing is the process of identifying the relationships between stages and substages of an event (or order of numbers, operations, steps, etc.). In the outside rectangle write the name for the event, or sequence. In the larger rectangles-flowing from left to right-write in the major stages of the event. In the smaller rectangles below, write in the substages of each major stage.
 On the initial use of the Flow Map, it can be with just the information above. This will be expanded when doing Community to use the Frame of Reference as well. The Frame can be used to expand with details and evidences about themselves. An example is if they write they a sequential part of their day, then can add in the frame examples of how this impacts other people. Like above, when doing the Flow Map with the Frame, and all maps and the frame, it is important the teacher models doing the map for themselves first as a model of thinking and doing.
An overview video on using the visual tool for sequencing (Flow Map – Thinking Maps® language) inductively including Priming -> Processing -> Retaining for Understanding, and a brief at the end overview of the five days with Who Am I.
1. Community Building with Sequencing InductivelyParticipants face the inside of a large circle on their individual spots. We will then proceed to sequence in the center something we can create a sequence of in the classroom. Examples include:
• the order of our birthdays with January 1st the beginning through December 31st at the end;
• provide each student with one letter of the alphabet, then in silence the line up in letter order from A to Z. This could also be done with numbers;
• have the students line up and create a story in sequential order;
• elicit other ideas from the students.
Begin with a small group of several students to model how they will determine the information and then put themselves in order. This can be done vocally or in silence which then inspires other ways to communicate. Debrief the students on the purpose of this community building exercises.
More on Building Community Together
More on Inductive Thinking with Visual Tools (Cognitive Processes)
2. Inductively Identifying and Sequencing the Above Community Building Exercise![]() As a whole class, the teacher discusses what were some of the key steps to having the students do the sequencing community builder. After the whole group discussion, have each student draw one picture (on index cards or sheets of paper) of one step they think no one else will think of. Then model with a small group of students (3-6) to silently sequence their drawings in the order of the community building exercise. Have each student share their drawing, then change anything if needed in the order. Have all the small groups do the same order of events: sequence silently; share their drawings; re-order if necessary.
As a whole class, the teacher discusses what were some of the key steps to having the students do the sequencing community builder. After the whole group discussion, have each student draw one picture (on index cards or sheets of paper) of one step they think no one else will think of. Then model with a small group of students (3-6) to silently sequence their drawings in the order of the community building exercise. Have each student share their drawing, then change anything if needed in the order. Have all the small groups do the same order of events: sequence silently; share their drawings; re-order if necessary.
More on Inductive Thinking with Visual Tools (Cognitive Processes)
3. Collaboratively Share Daily School Things We Do (Based on the previous two days)
Have the students in a Think-Pair-Share format share things we do each day in class (based on this week as a focus). First a teacher models with a student; then two students; then all students; whole class share. This sets the stage for the next step of processing the sequence of a day in the classroom. This will also set the stage for taking this sequencing process to daily home events to learn more about each other.
Flow Map (Thinking Maps®) for Sequencing – Teacher Modeling![]() The teacher will initially model how they do a Flow Map for their day at home. This could be specific to the morning (before school), the evening (after school) and/or a weekend day (non-school day). The teacher will then model on separate pieces of paper (index card size) several things they do each day — one on each of the several (3-5) cards. The teacher will then sequence the cards in the order the home events happen.
The teacher will initially model how they do a Flow Map for their day at home. This could be specific to the morning (before school), the evening (after school) and/or a weekend day (non-school day). The teacher will then model on separate pieces of paper (index card size) several things they do each day — one on each of the several (3-5) cards. The teacher will then sequence the cards in the order the home events happen.
Flow Map (Thinking Maps®) for Sequencing – Teacher-Student Modeling
The teacher will do another Flow Map on a different part of their day (at home). This time both the teacher a student will model doing their individual papers on 3-5 events at home (morning, evening or non-school day). The teacher will model collaborating on ideas from each of their respective homes using questions to come up with ideas. When each has 3-5 cards of individual events, they will then put their respective cards in sequence. After they are both done, a protocol of a positive observation, a question, and an idea learned from their partner will be modeled.
Flow Map (Thinking Maps®) for Sequencing – Student-Student Modeling, Then All in Pairs
Following the same format as above, the teacher will start with a pair of students modeling, then pair up all in the classroom to having everyone create 3-5 cards of events in their home days (morning, evening or non-school day), then sharing with each other in pairs. After all have finished in pairs, if there is time, a gallery walk so each student can share their sequence to the whole class grows the community.
Extension with Frame of ReferenceThe Frame can be added to the Flow Map to have additional information on who participates in each of the events with the student. The teacher will model theirs first.
To support the Retaining for Understanding several pathways are suggested:
• individual oral presentations reading from the maps;
• free write
• writing from a sentence pattern and/or free write extension expanding from the sentence frame (differentiation)
Presentations: For beginning readers/writers especially with pre-k and K, the students can read their maps following their images in reading. An example is they share
‘The sequence of my day has many events.’
‘First I ________. ‘;
‘Second I ________. ‘;
‘Third I ________. ‘;
‘Fourth I ________. ‘;
When presenting each student stands, says “Hello my name is ________” or similar, then shares two things on their Thinking Map, followed by showing the map to the whole class.
Free Write: The students write about themselves from the information on the Flow Map. It is important the teacher model strategies of writing from their personal Flow Map with the students observing. I would then have a student do the same with the class observing (either via a projection with the student’s actual writing and/or in a fishbowl setting). Then all students write. After writing I would have students read one sentence (a ‘favorite’) from their writing to the whole class. This provides affirmations and models of success.
Sentence Frame (Patterns): Students are provides a sentence frame to write from. Writing patterns build an understanding of sentence structure in a non-threatening manner. It is important to develop ideas through patterns, visual mapping, collaborative recitation, vocabulary building, working language with a pocket chart, and writing. It will benefit the students to use words for patterns that reflect common usage (see the list of 100 and 1000 most used words in the English language). Patterns provide models of excellence while building on the brain seeking patterns. The goal is to set the stage for successful original writing.
Some simple examples include:
My day sequenced includes many things.
First I ________.
Second I ________.
Third I ________.
Fourth I ________.
…
First I ________ to _______.
Second I ________ because _______.
Third I ________ with _______.
Fourth I ________ for _______.
…
To facilitate success initially model and have students ‘read’ their maps following the flow with their fingers reading their maps orally. This is similar to the reading above with presentations with the examples: they share ‘I like ice cream’; ‘I like to go fast’; and so forth.
Class Reflection
Share the ‘tools’ we used to develop our ideas and help our presentations and writing. Some examples they will share are the Flow Map for sequencing; Think-Pair-Share; the collaborative methods; and so forth.
| | | ||
| Day 1: Brainstorming | Day 2: Qualities | Day 3: Sequencing | Day 4: Cause / Effect | Day 5: Categorization |
Day 4 – Fourth Map: Flow Map (Thinking Maps®) for Causation (Cause and Effect)
“A man is worked upon by what he works on. He may carve out his circumstances, but his circumstances will carve him out as well.”
―
OverviewThe Multi-Flow Map is used for showing and analyzing cause and effect relationships. In the center rectangle, write in an important event that occurred. On the left side of the event, write in the causes of the event, and on the right side, write in the effects of the event. As you identify more causes and effects, add them to the Map. If you are studying a system, you will find that there are effects in the system that, in turn, influence initial causes. This circular cause and effect relationship is called a feedback loop.
 On the initial use of the Multi-Flow Map for cause/effect, it can be with just the information above. This will be expanded when doing Community to use the Frame of Reference as well. The Frame can be used to expand with details and evidences about themselves. An example is if they have an event with the cause and effect, they can add in the frame an example of how this impacts other people. Like above, when doing the Multi-Flow Map with the Frame, and all maps and the frame, it is important the teacher models doing the map for themselves first as a model of thinking and doing.
A five minute overview of Cause and Effect for Day 4.
1. Community Building with MirroringParticipants face the inside of a large circle on their individual spots. We will then proceed to do the community building exercise of mirroring. The teacher initially leads with mirroring, then picking a student to lead, who then picks another student. In addition to empowering students to be the leaders, this provides an excellent time for the teacher, while following the lead student, to also notice the other students in the classroom. An extension in addition to whole group, is mirroring in pairs. Both the whole group and in pairs is excellent to build collaboration, observing and listening skills and developing focus. See the section on mirroring in Community Building Exercises.
More on Building Community Together
2. Commonalities
Participants face the inside of the circle on their individual spots. Today the focus is on events in our lives. The teacher leads with an important event in their life (e.g. I flew on a plane). Then anyone else that has a similar event in their lives will go across the circle. The person who just went across, picks another person to share an important event, and so forth.
More on Building Community Together
3. Collaboratively Share Important Events in Our Lives
A. While still in a circle, model sharing important events (teacher – student) in your lives, then two students and finally all paired up. It will be important when doing a personal Multi-Flow map to have a clear event to then build causes and effects in the Multi-Flow Map.
B. The teacher then picks an event that happens at school (e.g. lunch), draws the Multi-Flow Map on white board, large paper and/or projection. The teacher then asks what are some ’causes’ of this event. The teacher then models Pair-Share with a student on just causes of this event. The same sequence of two students modeling, then all in pairs follows.
C. The above sequence for Pair-Share is now done for ‘effects’ with the same event.
Whole Class Multi-Flow Map
The teacher leads the whole class on a Multi-Flow Map for the event they just explored with Think-Pair-Share to model it in written (words and drawings) form. This provides a model for students to use when doing their personal events.
Individual Multi-Flow Maps
Teacher models theirs, then with a small group to model collaborating while each student in the small groups is doing their personal event Multi-Flow Map.
Writing / Presenting the Multi-Flow Map
To support the Retaining for Understanding several pathways are suggested:
• individual oral presentations reading from the maps;
• free write
• writing from a sentence pattern and/or free write extension expanding from the sentence frame (differentiation)
Presentations: For beginning readers/writers especially with pre-k and K, the students can read their maps following their images in reading. An example is they share
‘The main event that I would like to share the causes and effects is ________. ‘
‘One cause is ________. ‘;
‘One effect is ________. ‘;
When presenting each student stands, says “Hello my name is ________” or similar, then shares two things on their Thinking Map, followed by showing the map to the whole class.
Free Write: The students write about themselves from the information on the Multi Flow Map for cause and effect. It is important the teacher model strategies of writing from their personal Multi Flow Map with the students observing. I would then have a student do the same with the class observing (either via a projection with the student’s actual writing and/or in a fishbowl setting). Then all students write. After writing I would have students read one sentence (a ‘favorite’) from their writing to the whole class. This provides affirmations and models of success.
Sentence Frame (Patterns): Students are provides a sentence frame to write from. Writing patterns build an understanding of sentence structure in a non-threatening manner. It is important to develop ideas through patterns, visual mapping, collaborative recitation, vocabulary building, working language with a pocket chart, and writing. It will benefit the students to use words for patterns that reflect common usage (see the list of 100 and 1000 most used words in the English language). Patterns provide models of excellence while building on the brain seeking patterns. The goal is to set the stage for successful original writing.
Some simple examples include:
An important event in my life was ________.
One cause was ________.
Another cause was ________.
A third cause was ________.
One effect was ________.
Another effect was ________.
A third effect was ________.
An important event in my life was ________.
…
To facilitate success initially model and have students ‘read’ their maps following the flow with their fingers reading their maps orally. This is similar to the reading above with presentations with the examples: they share ‘I like ice cream’; ‘I like to go fast’; and so forth.
Class Reflection
Share the ‘tools’ we used to develop our ideas and help our presentations and writing. Some examples they will share are the Multi Flow Map for cause and effect; Think-Pair-Share; the collaborative methods; and so forth.
| | | ||
| Day 1: Brainstorming | Day 2: Qualities | Day 3: Sequencing | Day 4: Cause / Effect | Day 5: Categorization |
Day 5 – Fifth Map: Tree Map (Thinking Maps®) for Categorization
“The more you speak more languages, the more you understand about yourself.”
—Sandra Cisneros
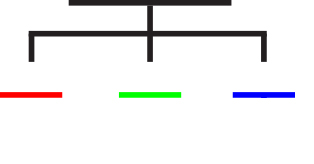
Overview![]() The Tree Map is used for classifying things and ideas. On the top line write the category name, on the second level of lines write the subcategories, and below each subcategory write the specific members. Classifying is the process of sorting things into categories or groups and creating new categories, often according to common qualities.
The Tree Map is used for classifying things and ideas. On the top line write the category name, on the second level of lines write the subcategories, and below each subcategory write the specific members. Classifying is the process of sorting things into categories or groups and creating new categories, often according to common qualities.
 On the initial use of the Tree Map for classification, it can be with just the information above. This will be expanded when doing Community to use the Frame of Reference as well. The Frame can be used to expand with details and evidences about themselves. An example is if they write they categorize things about themselves, then can add in the frame an example of how this impacts other people in their family. Like above, when doing the Tree Map with the Frame, and all maps and the frame, it is important the teacher models doing the map for themselves first as a model of thinking and doing.
A brief video overview of Categorization for Day 4.
PowerPoint for Who Am I and Categorization (Tree Map – Thinking Maps®) used with fourth grade students in Redwood City School District by the district coach Whitney Eakin (September 2021).
Download the PowerPoint.
1. Community Building with Inductive ClassificationThe students will sort themselves by a particular common feature. An example could be shoes by color or type. An order of doing this the first time could be:
• The teacher with several students models to the whole class creating groupings in silence — e.g. with shoes they are wearing, or hair, or ? After creating the categories, the group decides on the title of each of the sub categories (shoes is the main category, types of the sub categories).
• Each participant in the modeling group picks another person and the second group models the same procedure.
• Depending on the class, then this is continued with the whole class or the class in 2 sections. After creating the subcategories, the titles of the subcategories are decided by each group.
Elicit other things they can classify themselves. This could be captured in a Circle Map to use on other days. It is good to do this again with other categorizations as it builds collaboration, the community, observing and listening skills, and is an important cognitive process for organizing thinking.
2. Inductively Sorting Objects
Students can use either objects from inside the classroom and/or from outside. Each student would find 4-5 objects and bring them back to their small group of 3-4 students. The teacher would initially model as a participant with one group with the whole class observing.
3. Think Pair ShareHave the students in a Think-Pair-Share format share things they have at home. This can be framed by the teacher stating: ‘What would you want to show me?’ First a teacher models with a student; then two students; then all students; whole class share. This sets the stage for the next step of processing the sequence of a day in the classroom. This will also set the stage for taking this sequencing process to daily home events to learn more about each other.
 The Students will use a circle map to come up with the different things they have at home. The teacher models doing theirs with a student who is doing their own. The teacher could frame this with: ‘What would you want to show me?’ Then two students model with the whole class observing, followed by the whole classroom doing it in pairs. After developing the map with things that are in their home, they will then transfer each item to an individual small paper (size of a sticky note) then sort them inductively. It is recommended the teacher models sorting their map with all students observing and teacher asking for contributions of suggestions.
 After sorting the individual items into categories, it is modeled coming up with titles (labels) for each subcategory of the main category of name’s things at home (or similar). After the teacher models their inductive sorting, every student does their own individual sorting and creating a title for each category. It is recommended having students being able to see each other doing their individual categorizations, and if possible (pandemic in mind) in pairs or small groups working concurrently on their own with accessing one another as a resource to help and affirm.
Writing / Presenting the Tree Map
To support the Retaining for Understanding several pathways are suggested:
• individual oral presentations reading from the maps;
• free write
• writing from a sentence pattern and/or free write extension expanding from the sentence frame (differentiation)
Presentations: For beginning readers/writers especially with pre-k and K, the students can read their maps following their images in reading. An example is they share
‘I have many things at home including:’
‘One thing I have at home is ________. ‘;
‘A second thing I have at home is ________. ‘;
‘A third thing I have at home is ________. ‘;
‘A fourth thing I have at home is ________. ‘;
When presenting each student stands, says “Hello my name is ________” or similar, then shares two things on their Thinking Map, followed by showing the map to the whole class.
Free Write: The students write about themselves from the information on the Tree Map for categorization. It is important the teacher model strategies of writing from their personal Tree Map with the students observing. I would then have a student do the same with the class observing (either via a projection with the student’s actual writing and/or in a fishbowl setting). Then all students write. After writing I would have students read one sentence (a ‘favorite’) from their writing to the whole class. This provides affirmations and models of success.
Sentence Frame (Patterns): Students are provides a sentence frame to write from. Writing patterns build an understanding of sentence structure in a non-threatening manner. It is important to develop ideas through patterns, visual mapping, collaborative recitation, vocabulary building, working language with a pocket chart, and writing. It will benefit the students to use words for patterns that reflect common usage (see the list of 100 and 1000 most used words in the English language). Patterns provide models of excellence while building on the brain seeking patterns. The goal is to set the stage for successful original writing.
Some simple examples include:
My things at home can be sorted into several categories.
One category is ________.
One thing is a ________.
Another thing is ________.
A second category is ________.
One thing is a ________.
Another thing is ________.
A third category is ________.
One thing is a ________.
Another thing is ________.
…
To facilitate success initially model and have students ‘read’ their maps following the flow with their fingers reading their maps orally. This is similar to the reading above with presentations with the examples: they share ‘I like ice cream’; ‘I like to go fast’; and so forth.
Class Reflection
Share the ‘tools’ we used to develop our ideas and help our presentations and writing. Some examples they will share are the Tree Map for categorizing; Think-Pair-Share; the collaborative methods; and so forth.
Educators at a professional development categorizing objects inductively.
Watch upper elementary students from the 1 minute 35 second mark to approximately the 3 minute 30 seconds using the Circle Map and then categorizing inductively. Inductive Categorization.
Watch high school students from the 27 second mark to approximately the 1 minute 30 seconds using the Circle Map and then categorizing inductively.